Free Printable Valentines Day Card
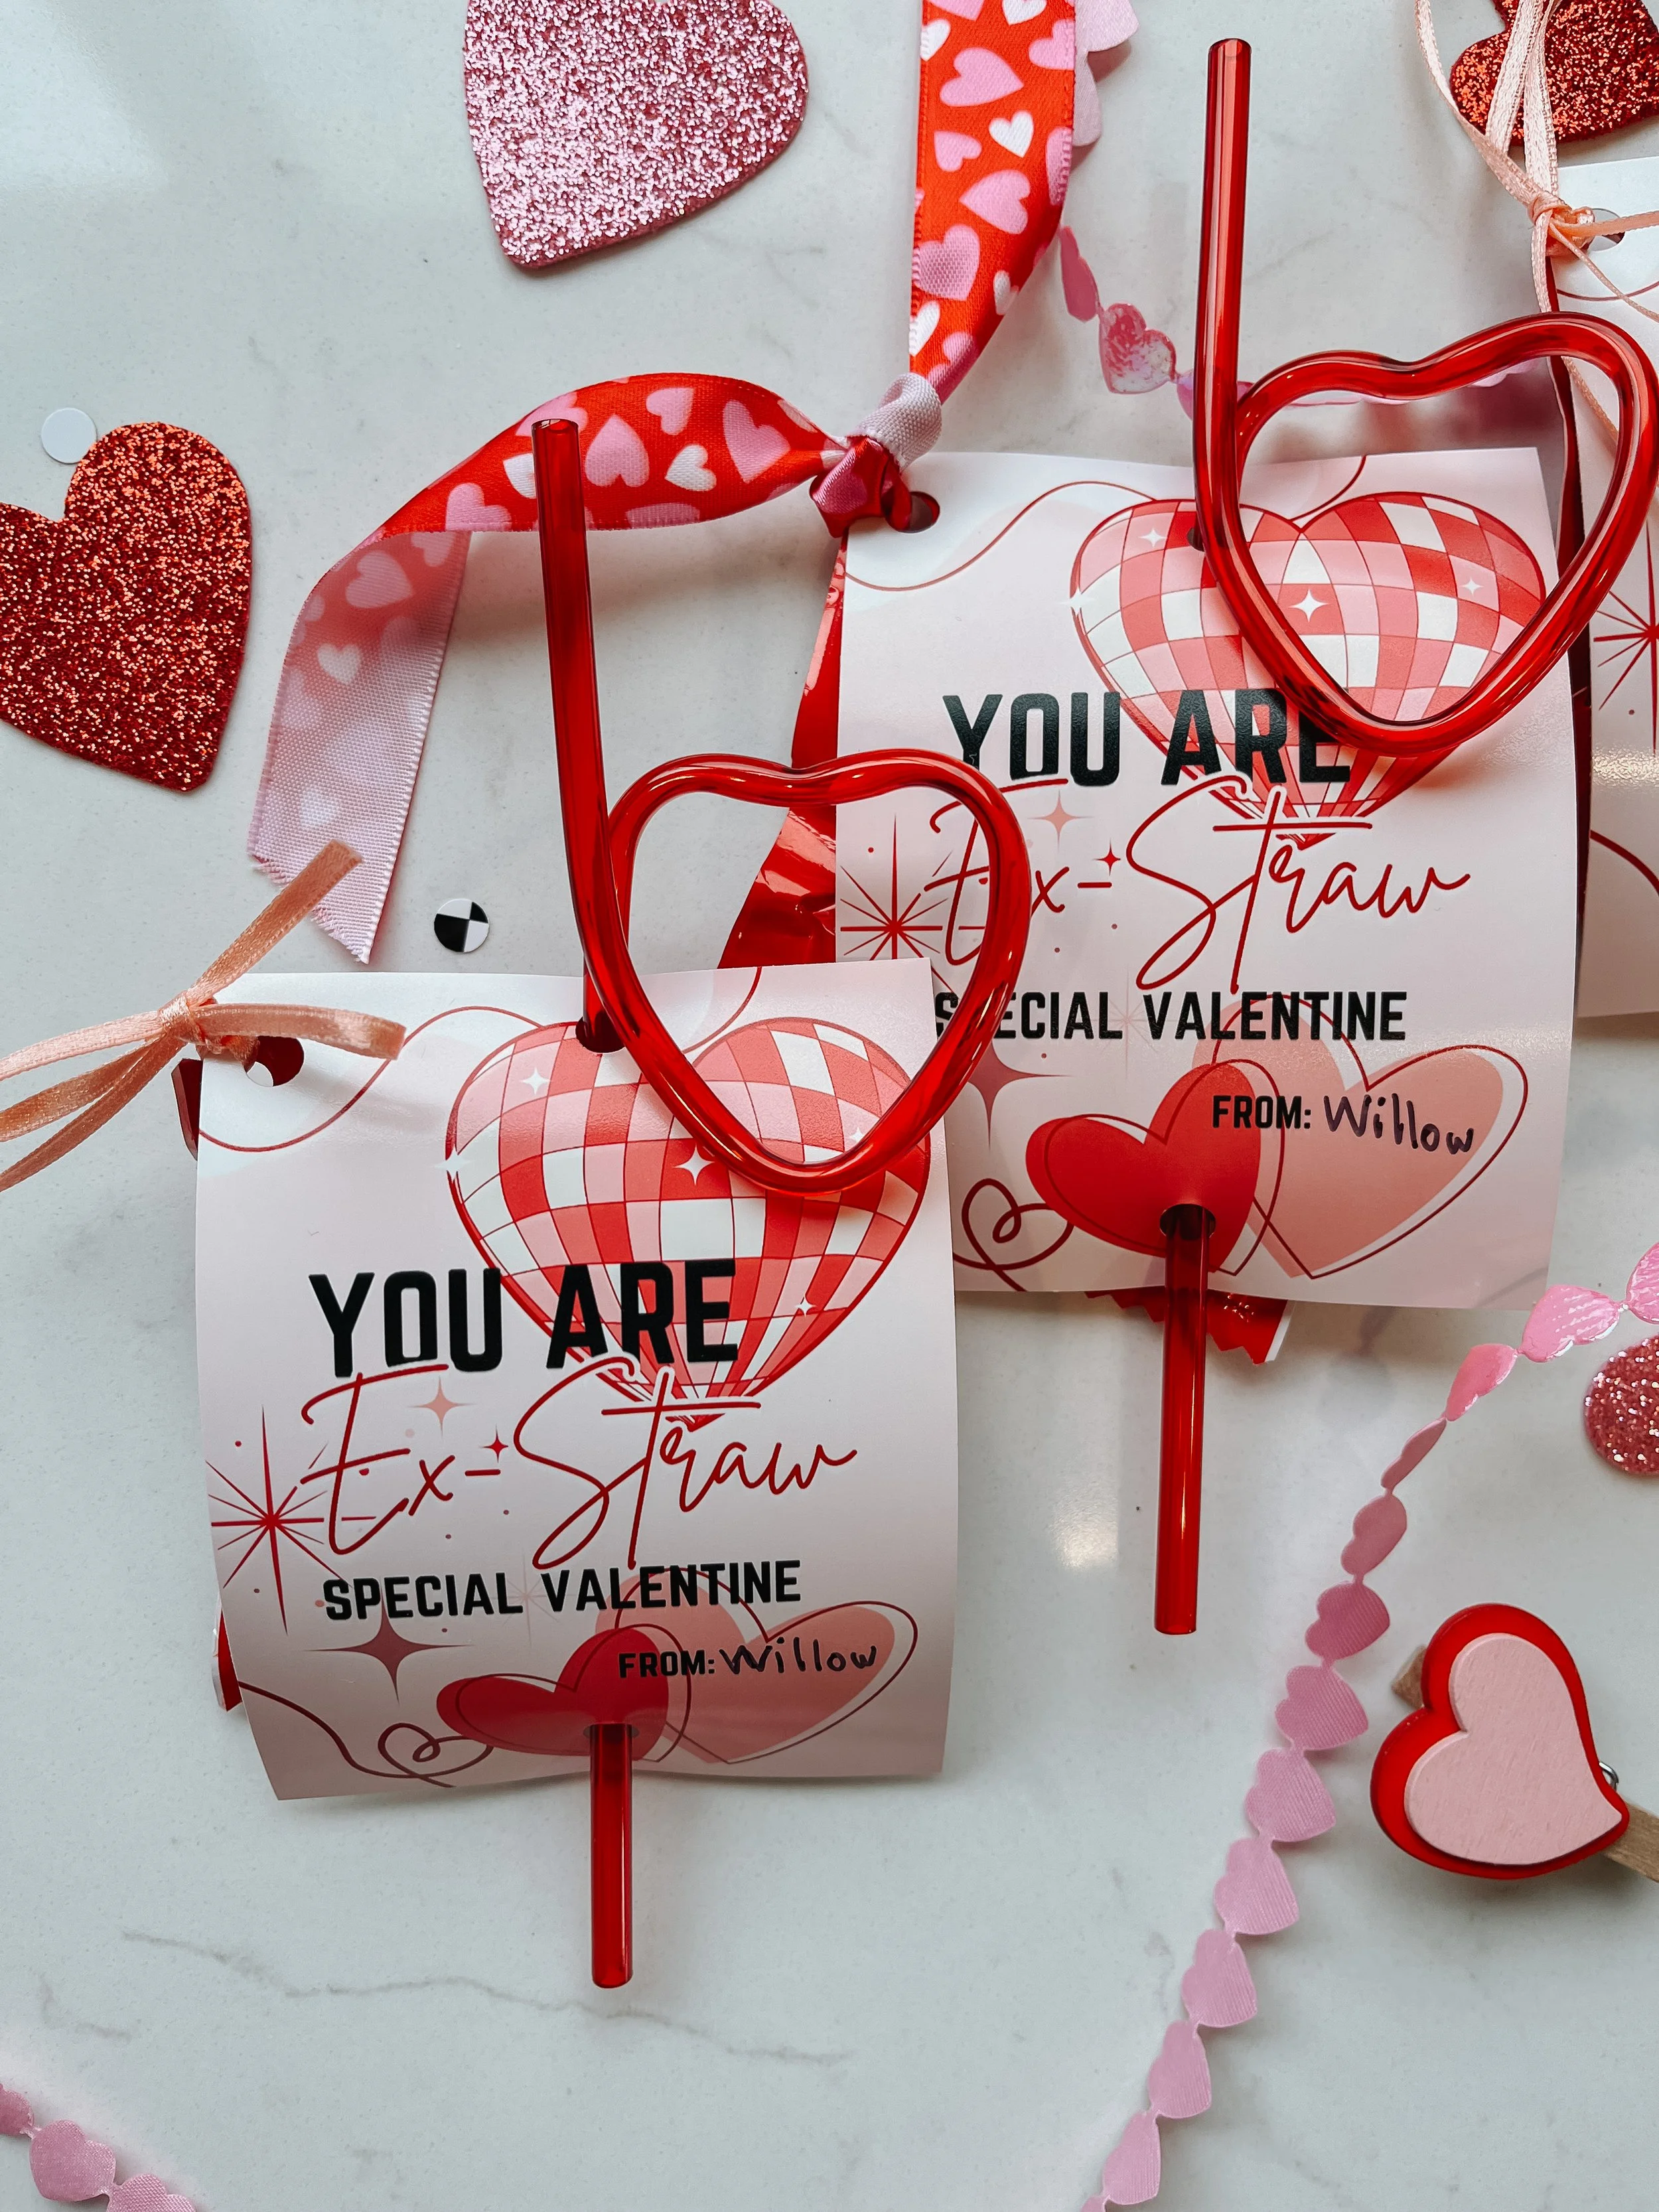
Homemade “You are Ex-straw Special Valentines” - including a heart swirly straw, and your kiddos favorite treat! A Budget Friendly DIY Valentine.

These handmade Valentines are sure to be a Hit!
Free Printable Below

One of the things I look forward to doing most with my kiddos is Homemade Valentines! It’s so fun to encapsulate their personality into a gift, and see what peaks their interest from year to year. We’ve done “lovebugs” multiple years, but this year my daughter wanted something that her “classmates could keep”. Kind of a challenge when it comes to gifting something for both boys and girls - but I always love a challenge. Aside from being on the lookout for something fun to gift- I also challenge myself to keep things BUDGET friendly. Always less than One Dollar a piece; but the goal is to do them for as affordable as possible.
I am PROUD to say that these valentines came in at just ¢.47 a piece!
The cost could easily be even cheaper - If you opted to print these at home. (I had them printed)

Full supplies List ☟
Full supplies List ☟
Printed Valentine Cards
Paper Cutter or Scissors
Festive Ribbon
Candies of choice - we opted for skittles
I first began by creating the Image for the Valentines themselves on Canva - but since I did the leg work for you there, you’ll be able to download the printable and get your valentines rolling!

When it comes to printing the Valentines you can easily print them at home on cardstock. I do not love my printer (probably time for an upgrade, shes real old) so i opted to have these printed at my local Walgreens. The file is a 4x6 and was easily uploaded to print same day. I don’t know about other local printing places but Walgreens has a “matte” option - which I chose. Always be sure to check for a coupon code when ordering through Walgreens Photo! This trip I got 40% off my prints. But word from the wise - never pay the full price!
Whichever option works best, just print those babies!

If you printed them at home, you’ll have to fully cut them out. If you order them through a local printing place - you’ll have to cut the 4x6 in half. Scissors of course will do the job, but a small paper cutter makes it effortless to get them straight!

The straws I picked up at my local Hobby Lobby - These were the whole inspiration for the Valentines themselves but I’ve done some digging and there are many options online you can snag! Here are a few:
Heart Straws #1 : these are the same ones used in this project
Heart Straws #2 : these ones are SO CUTE
Crazy Straws #3: not just hearts, but very affordable!
Ribbons and Candies are where you can get more individual with these Valentines.
Any thinner ribbon will work; just be sure that its not too wide to fit through the holes that will be punched. Dollar Tree has some really great ribbons around different holidays (heart one pictured) but even a plain ribbon works great!

When picking a candy - opt for one that you can punch a hole in to attach to the Valentine. If the candy does not have a pouch to punch it will need to be one thats small to attach to the back of the card using tape. or perhaps glue? If your try that route, let me know! We used skittles, and they were under $5 for the bag! Ill link those HERE.

Okay, Okay, Heres what you really came here for:
DOWNLOAD THE PRINTABLE VALENTINES HERE.

Now Lets get to making these Valentines
Print your Digital Valentines Day card
Using Scissors or a paper cutter - cut out the card
Have your child sign the cards -its easier to do now while the cards are flat and dont have anything attached to them.
Using a hole punch - punch a hole in the center of the top, as well as the center of the bottom of your card. This will be where your straw will go through your card
Punch a third hole in the top left corner of your card - this will be used to attach your candy to the card with a festive ribbon
Prep your candies by punching a hole in one of the corners. Be sure to leave enough room that you don’t break the seal of the bag.
Put your heart straw through the holes you punch in the center of the top and bottom. Making sure that you’re going through the front at the top, and back out to the front on the bottom. This will keep the straw from blocking the text in the middle of your card.
Next Cut a piece of ribbon 6”-8” in length
String the ribbon through the top left hole on your card, and through the hole on the bag of candy. Finish it off by tying a cute little bow
When making these I prepped, cut, punched, everything i could so that My daughter would be able to make the cards - assembly line style! She would grab a signed card, place a straw through, grab a candy, grab a piece of ribbon, and tie them together. All together we were able to complete these Valentines in under 20 minutes, and they turned out OH SO CUTE.

If you try these, or anything else on my site, be sure to tag me on socials so I can see your cutie creations!