
DIY Angel Ornament - Christmas Ornament

Click to Add This Pin to Pinterest
When it comes to kids christmas keepsakes, Im a more is more kind of gal.
I absolutely love Christmas, and now that I have a gang of littles my absolute favorite thing are handmade ornaments, or handmade Christmas items that I can keep long after they have left the nest. These years are FLEETING, and having little reminders of each year is so sweet, and so special.
My oldest is my little crafty gal, so doing this project together was so much fun. She not only made special angels for our tree(s) but went on to make ones for grandparents! She gave them out already, but these would make such a fun gift for grandma or grandpa!

The Angels take minimal supplies. (Hallelujah)
And the craft itself can be made with all different materials.
In this tutorial we used:
Plain ole white craft paper
Scissors
Christmas Bells & White Pom Poms
You could change things up, and use christmas themed paper, colored paper, twine, colored yarn or string, and just about any round object for the angels head. You could bejewel them with glitter, stickers, or use markers instead of paint. This really can be adapted to any childs interests or age/skill level.
Plug in that glue gun to get warmed up, grab the rest of your supplies and lets get rollin!
I started by taking the craft paper and folding it in half to get the center line. Take either one of the sides, and fold it in half again. Do this step again on the same side, and then a final 4th time. This will give you a guide for how wide each of your angels pleats (or folds) will be.

You'll now accordion fold your paper starting with the smallest section you created as your guide. To accordion fold - fold the small section of paper in, flip your paper over, and fold it back on itself. You'll turn your paper back over to the side you sarted with, and fold again. if viewed from the side the paper will look like a letter 'M". Continue turning over and folding back and forth till you get all the way to the end of the paper.


Measure to find the center of your folded paper. We want to cut and create to pieces that are equal in length.
Instead of grabbing a tape measure, I used the string!
Take your string, and cut a piece the same length as your paper. If you fold it in half, and cut, you now have the exact half you need to cut your folded paper. Save this piece of string to use if your making multiple angels. You'll be able to use it to see where you need to cut each one, with only measuring one time :)
Next take one of your halves, and fold it about 1/3 of the way down. Repeat this with your second piece.

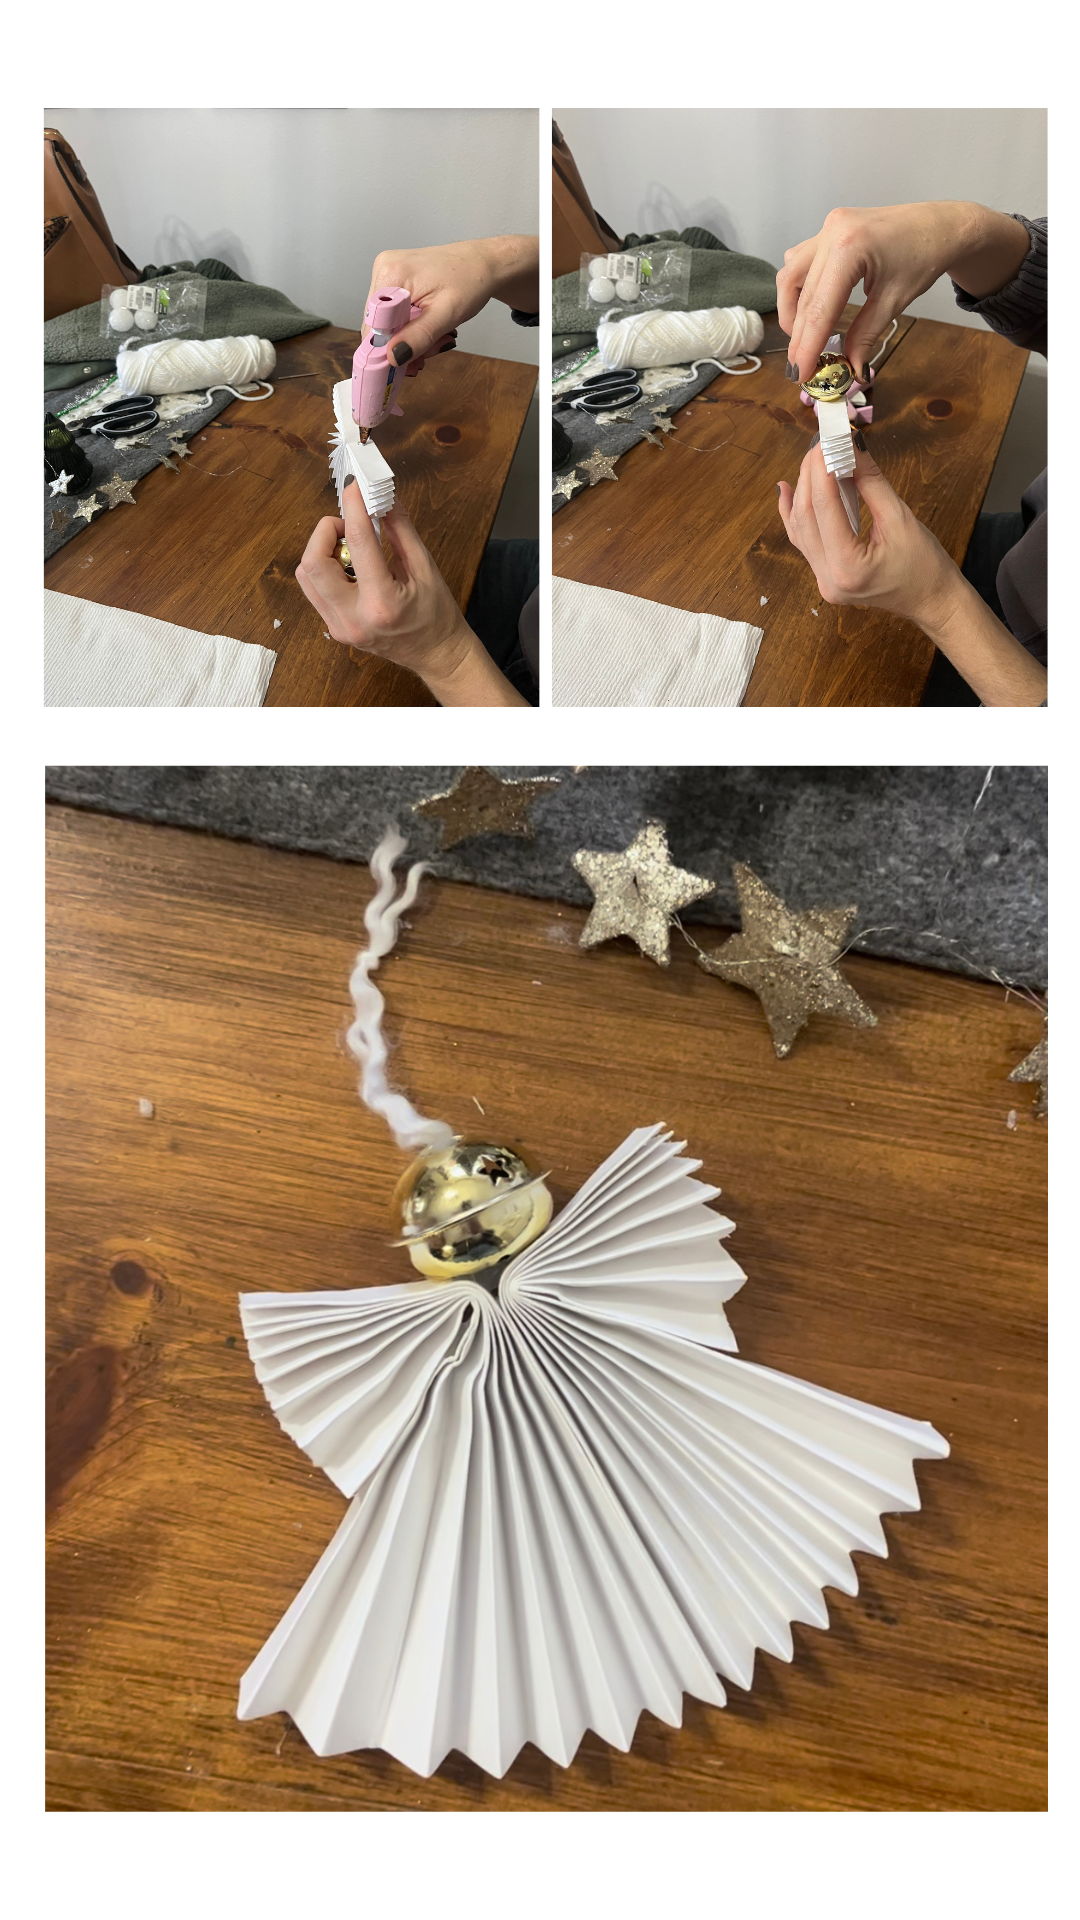
Now this is when some variety comes into play... Depending on what you're using for your angels head, you may have some additional steps. To attach something like the white glittery pom pom head keep reading. If your using bells, or something you can tie a string onto, skip down just a bit...
For the glittery pom pom you'll have to use a large needle to feed your string up through the pom pom and then back down the same hole creating your ornament loop. You'll use the tails that hang off the bottom to attach the head to where the angels body comes together. lots of words, check out what Im talking about real quick...

Now whether you're using the bell, or the pom pom like shown above, its time assemble our angel! Take one side of your angel, and add some hot glue. Take the second side, line up the bottoms and press them together. Add a dot of hot glue to the left and right side, to hold the wings down


If you opted for the Bell as your angels head, you will attach the head and your string now that your angel is assembled. Just place a dot of glue onto the top, and press on the bell to secure it. Cut a small Piece of string, and fee it through the top of your bell. Your angels ready to hang!
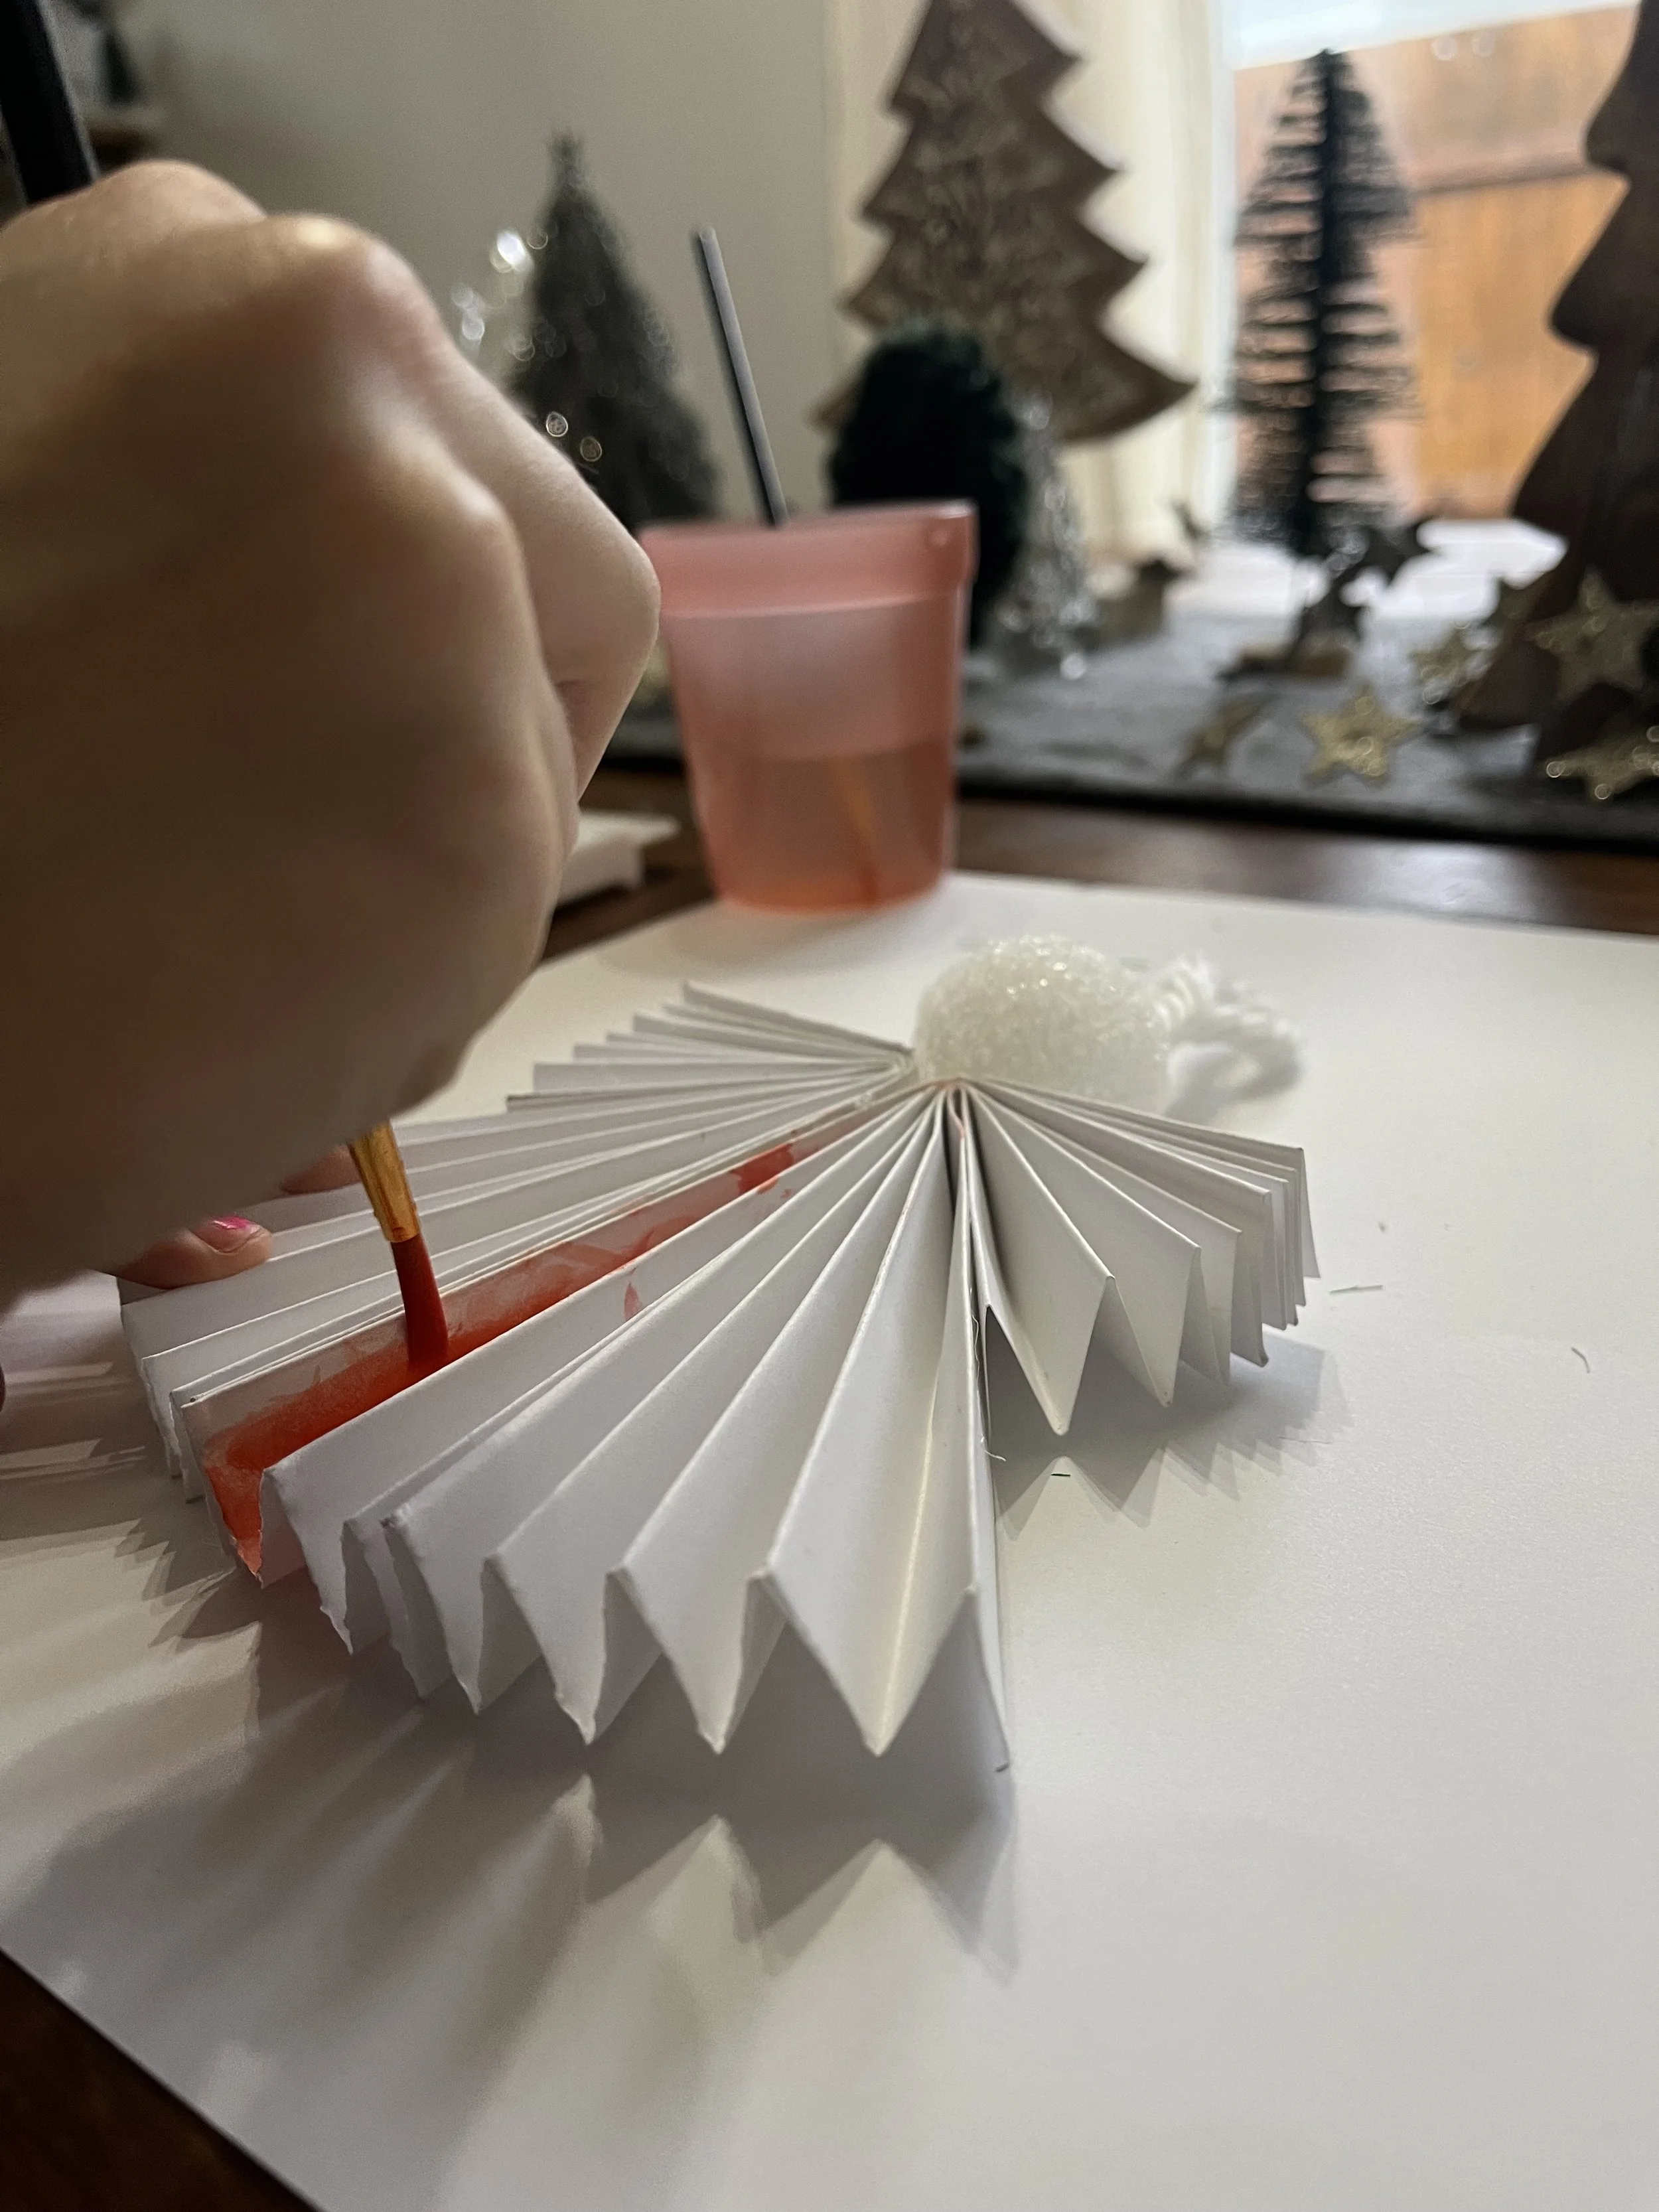
Its time for the fun! Now that the angel is assembled, your kiddos can customize and decorate the angels any way they would like! We went the watercolor route, and made lots of rainbow angels to adorn our trees. Each angel is so unique.


Click Here to Pin this Craft For Later
If you give these angels a try with your kiddos, id love to see!
Give me a tag on Instagram @JustSimplyCierra